Here you find all relevant information, instructions and tips for installing, configuring and using the Performance Reports for AffiliateWP plugin. This site will be kept up-to-date and offers you a comfortable and smooth start.
Installation
Technical requirements
Please ensure that your web hosting meets the following requirements:
- PHP 5.3 or later
- MySQL 5.0.3 or later
- WordPress 3.4 or later (tested up to the current version)
In general the above-mentioned requirements are easily met by all web hosting providers. For a fast Wordpress WebHosting we recommend Bluehost.
Activating the plugin
Installation via Uploader
- Login to your WordPress dashboard
- Navigate to Plugins and click Add New
- Click “Upload Plugin”
- Select the previously downloaded zip file and confirm by clicking Install Now
Installation via FTP
- Extract the affiliatewp-performance-reports.zip file on your computer
- Upload the affiliatewp-performance-reports directory to the /wp-content/plugins/ directory
- Login to your WordPress dashboard
- Navigate to Plugins and activate the plugin
That’s it!
Inside the following chapters, you learn how to configure and use the plugin correctly.
Configuration
The plugin settings page can be found when navigating as follows: Affiliates – Settings – Tab “Performance Reports”.
General settings
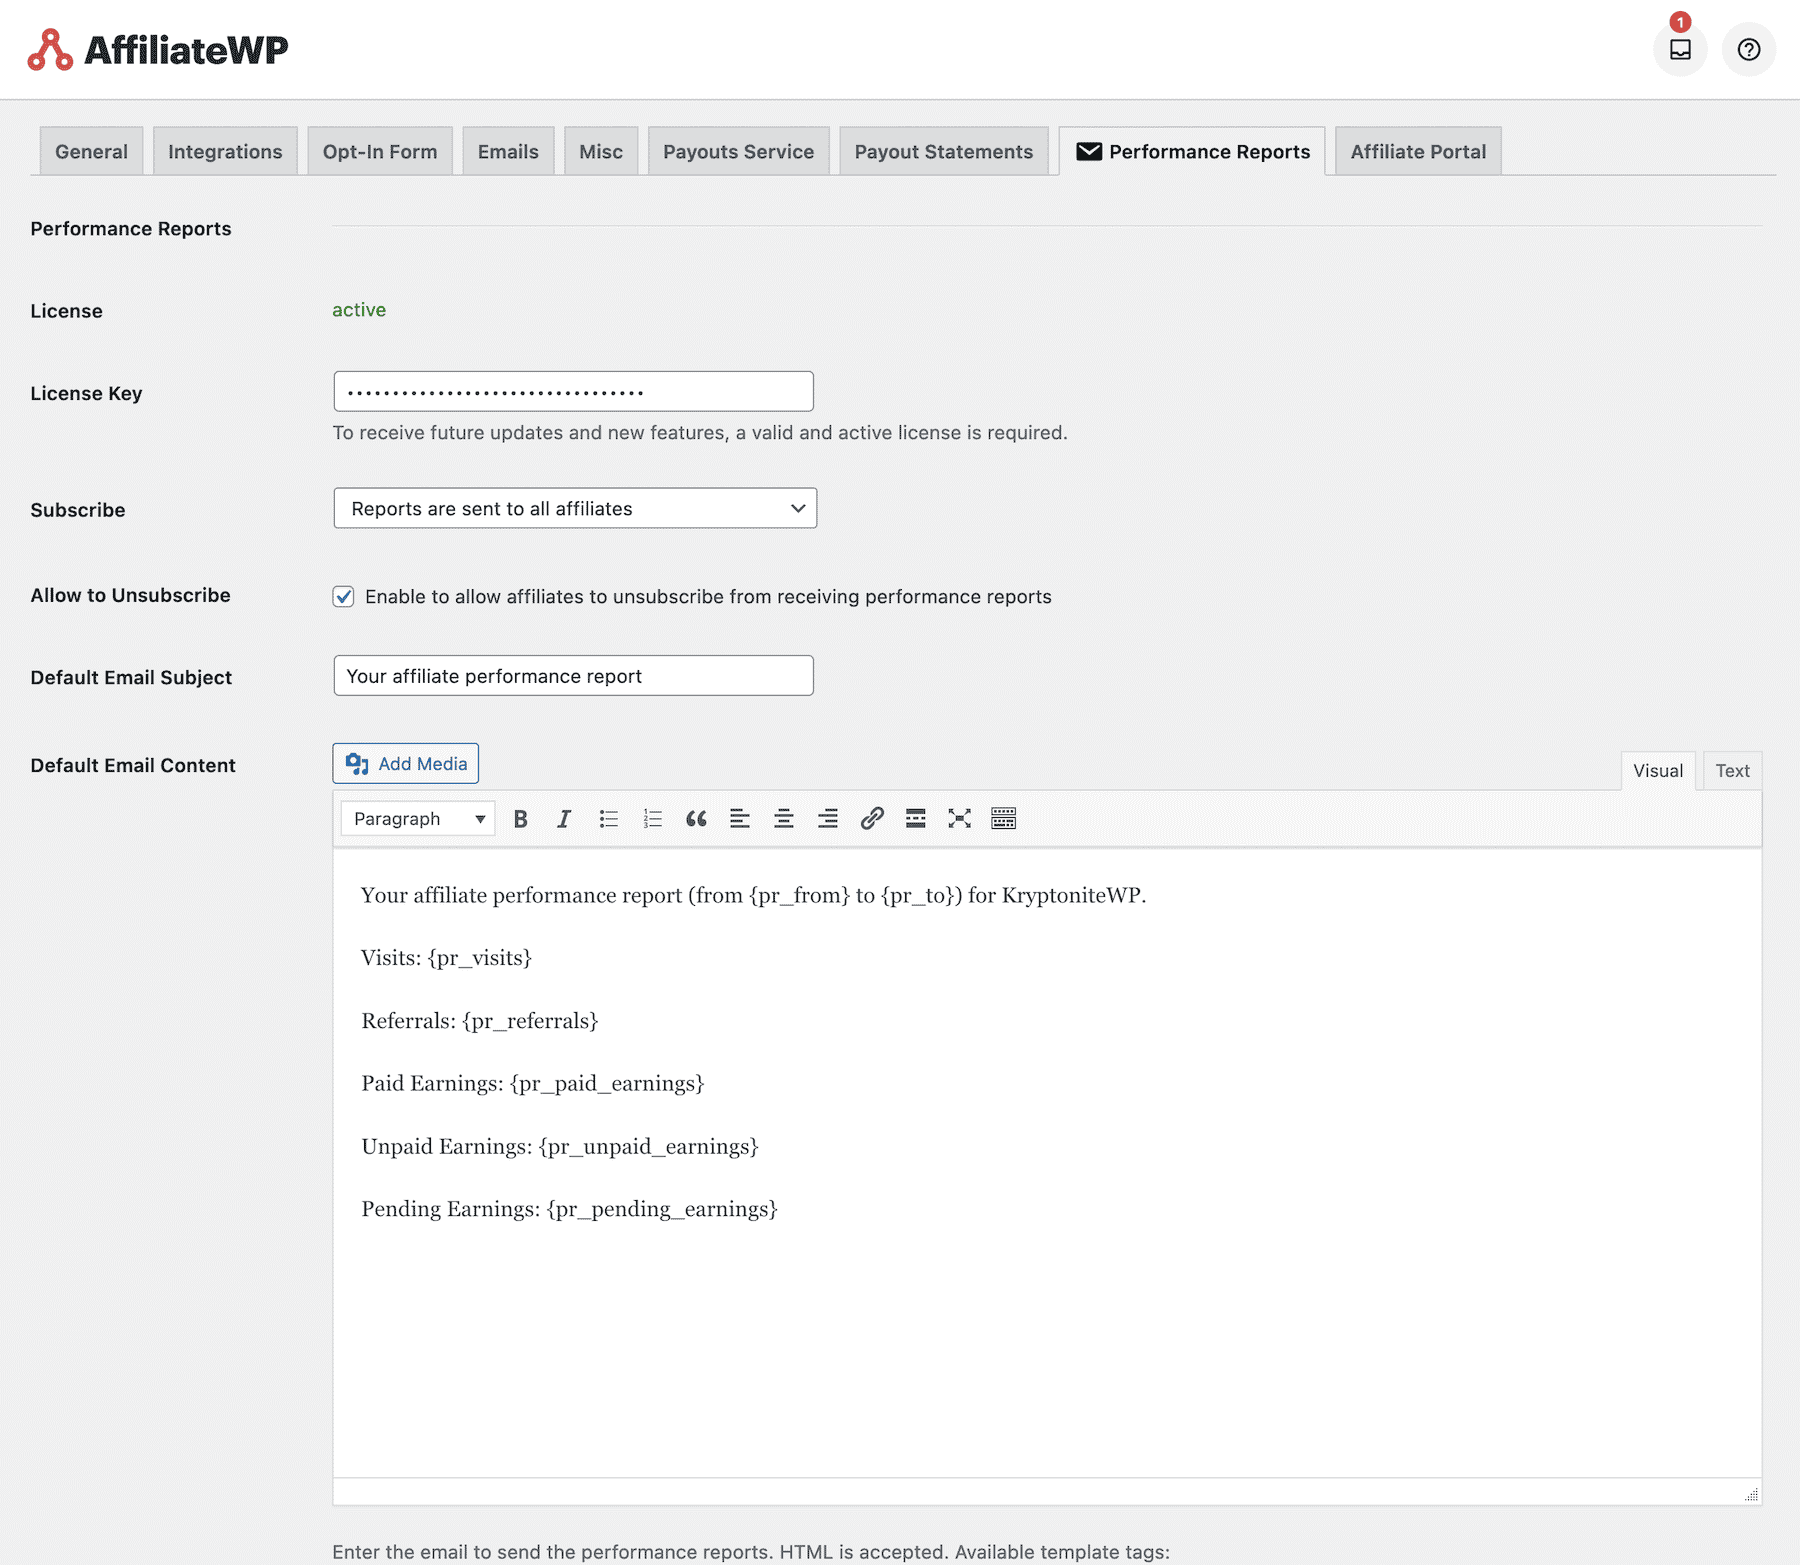
License Key
When purchasing the plugin, you received an email including your personal license key, which must be entered on the plugin settings page. Otherwise, you won’t receive any future updates.
Subscribe
With this setting, you have the choice to decide whether affiliates will receive your performance reports by default or you require them to manually sign up before receiving them.
Allow to Unsubscribe
By default, your affiliates can unsubscribe themselves from receiving your emails via a link in the email footer and your affiliate area settings.
Default Email Subject
The text that will be used as default for new emails. Before sending the emails, this can be changed later on.
Default Email Content
The text that will be used as default for new emails. Before sending the emails, this can be changed later on.
Here you can make use of AffiliateWP’s standard placeholders, as well as some new ones from our plugin.
Sending Reports
Define recipients
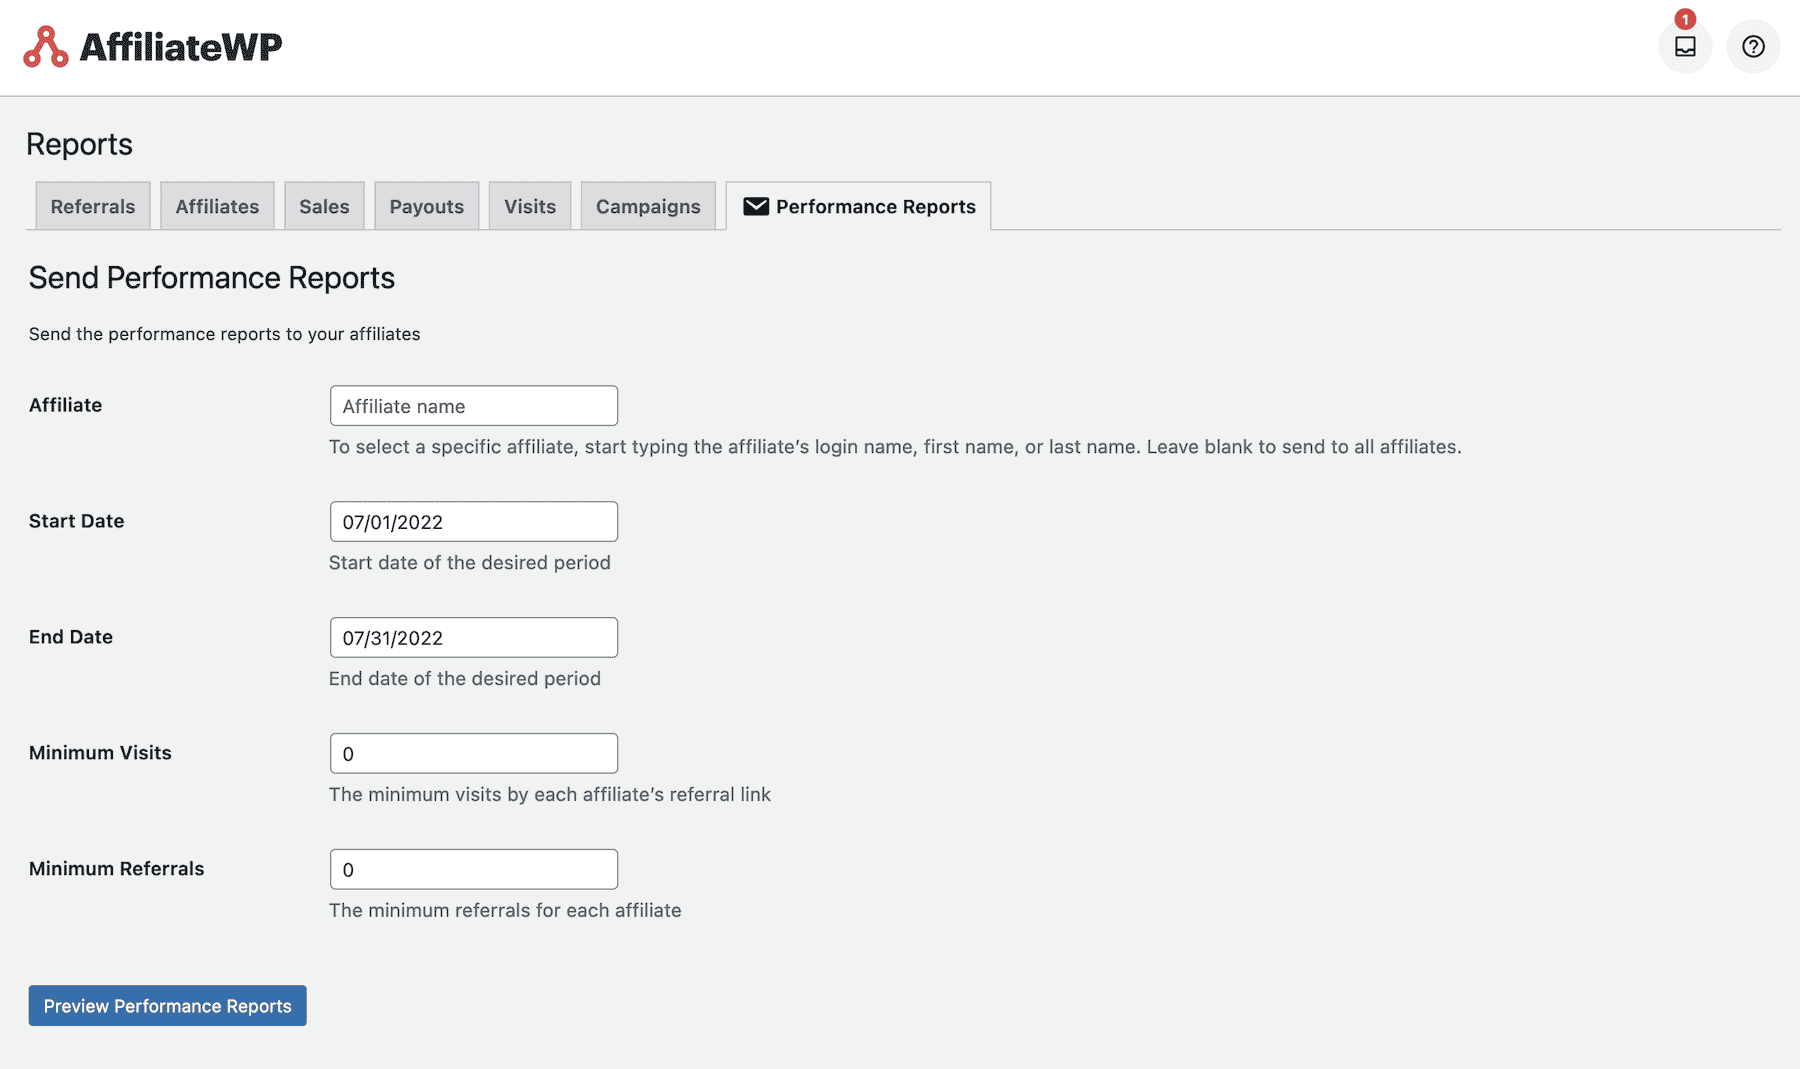
At the beginning, you have to define who should receive your next report.
For this, our plugin currently provides the following filters:
Affiliate
Specify whether the report should go to all affiliates or only to a specific one.
If you leave this field empty, all affiliates will be selected.
Start Date
The start date that will be used as the starting point for the period of performance values (e.g. calls or referrals).
For instance, if you only want to consider data from July, 1st onwards.
If you leave the field empty, the earliest possible date will be used.
End Date
Similar to the start date, you select the end date here.
For instance, if you only aim to consider data until July, 31th onwards.
If you leave the field empty, the latest possible date will be used.
Minimum Visits
Enter something here if you want the report to go only to affiliates with a minimum number of generated visits.
If you leave the field empty, 0 will be selected as default.
Minimum Referrals
Enter something here if you want the report to go only to affiliates with a minimum number of generated referrals.
If you leave the field empty, 0 will be selected by default.
Prepare and preview emails
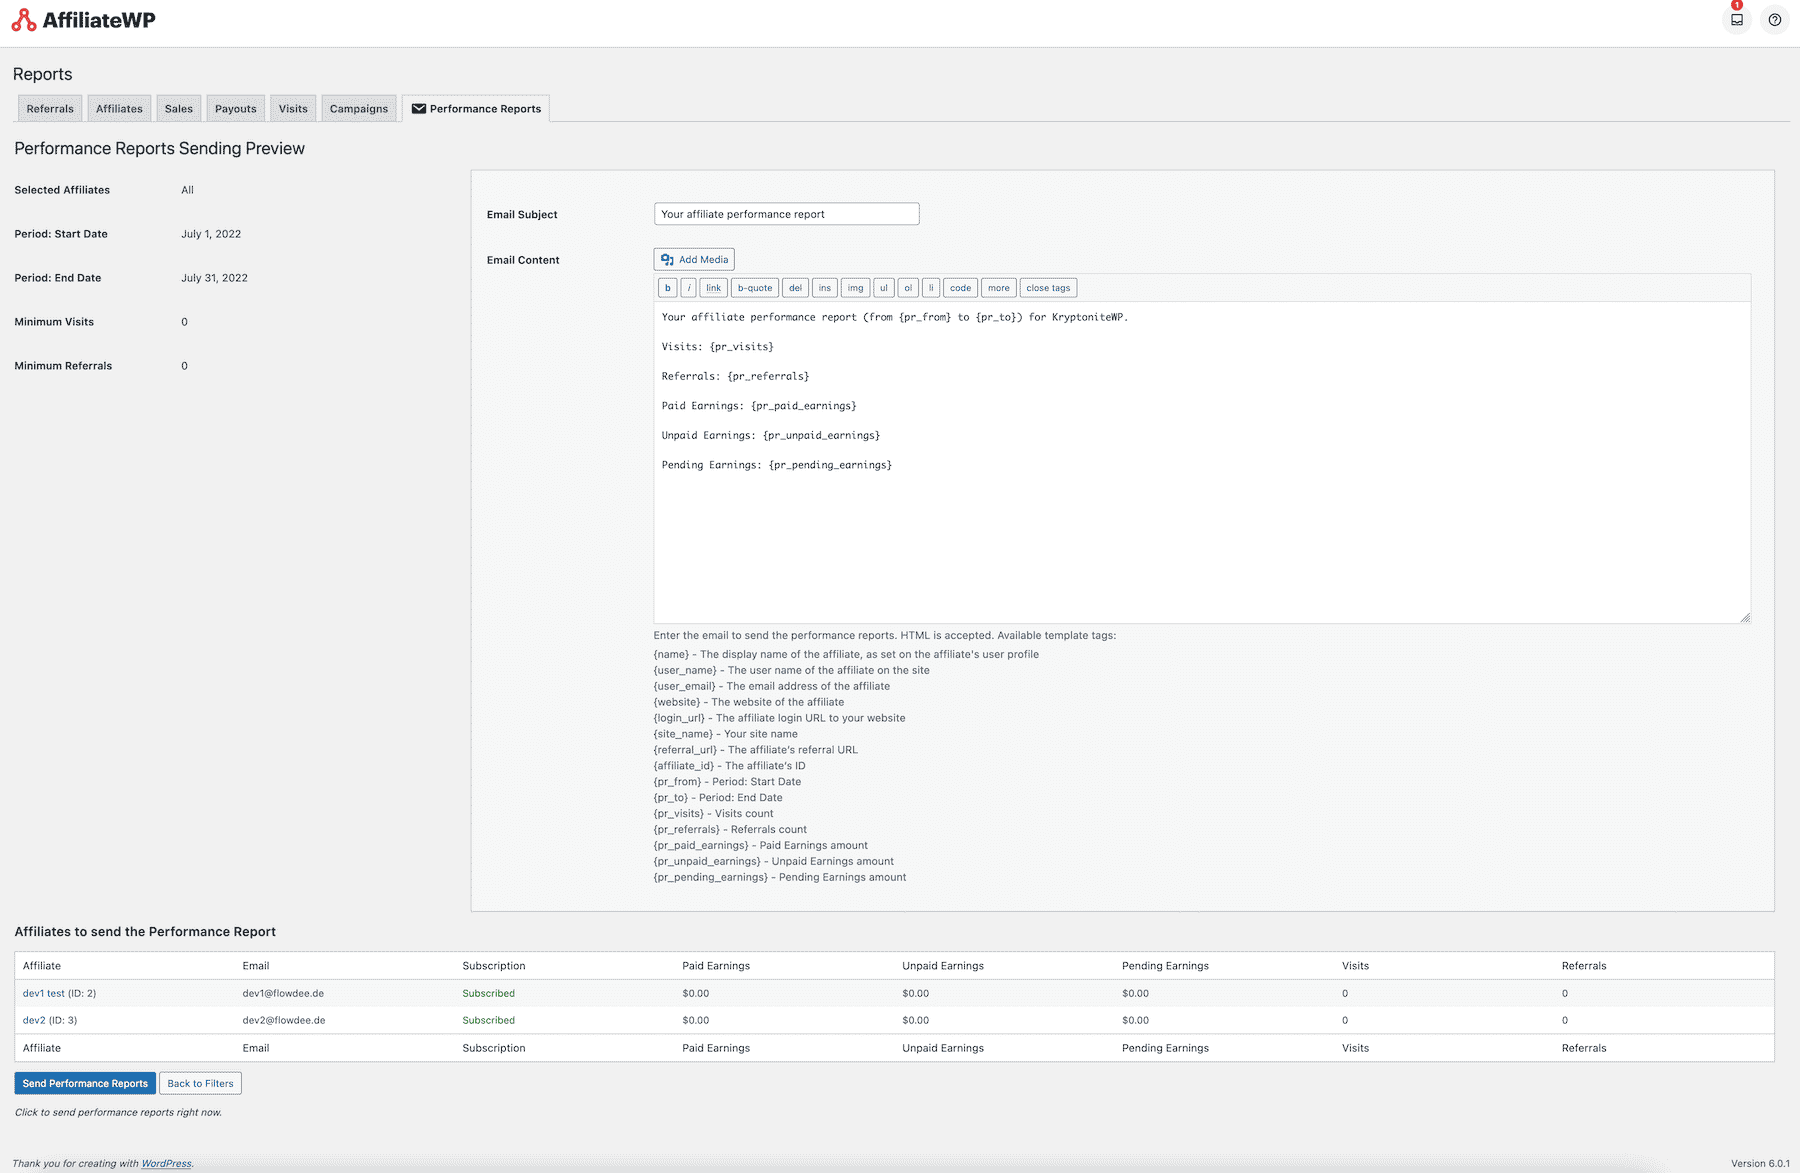
Once you have applied the filters for the recipients, you will get the following screens:
Filter Settings
At the top left, you will once again find the filters you selected in the previous step.
If you need to adjust the filter afterwards, you can click the corresponding button at the bottom of the page.
Email Preview
On the right side of the screen, you will see the preview of the email that your affiliates will receive.
The texts come from the plugin settings and serve you as a blueprint. You can edit them here and add placeholders if needed.
Please note: Whatever you adjust here will not be updated in the plugin settings.
Recipients Preview
At the bottom of the screen, you will find a preview of the affiliates who will receive this email report.
Affiliates who have already unsubscribed from receiving your reports will not be included in this list.
Sending performance reports emails
Once you have checked your filters and recipients, as well as finalized the texts, you can start sending the emails.
With a click on “Send Performance Reports”, the emails are sent to the previously specified recipients.
Tip: To ensure a reliable email delivery, you should not rely on WordPress. Better use an email sending service. We recommend (and use ourselves) the combination of Postmark and FluentSTMP. You are welcome to try it out too!
Reports History
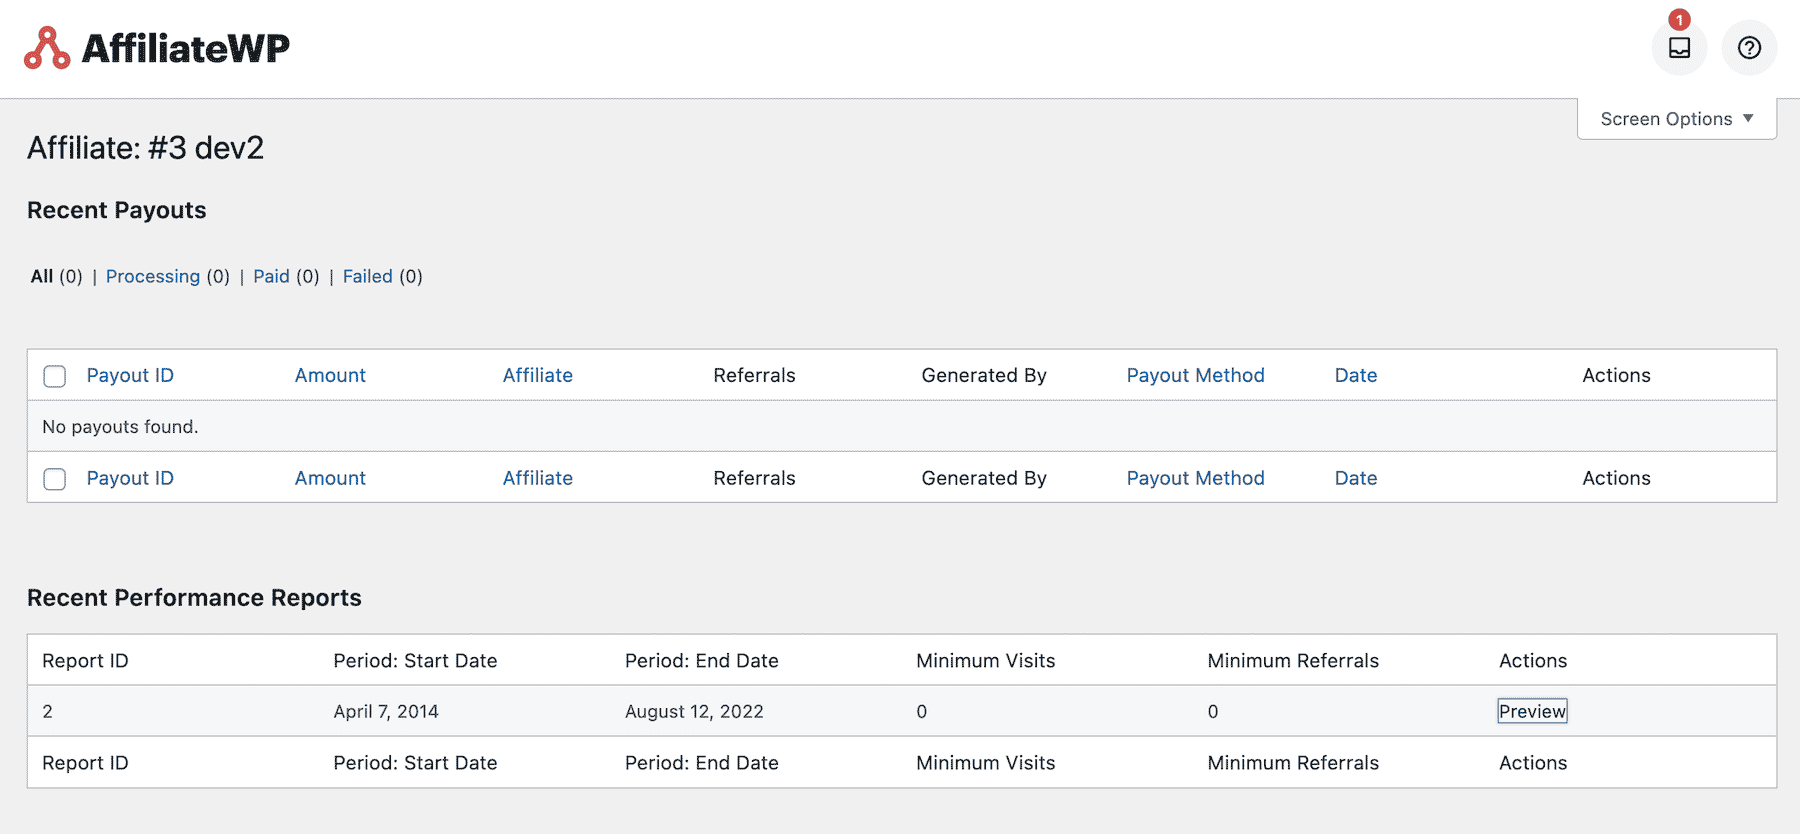
Currently, there is an overview for each affiliate if and when reports were sent to him.
This can be found on the affiliate’s details page in the admin area.
Plugin Updates
To automatically receive all updates, you have to activate your site by the license key you have already received directly after purchasing the plugin.