Here you find all relevant information, instructions, and tips for installing, configuring and using the Easy Digital Downloads – Bank Transfer Gateway plugin.
This site will be kept up2date and offers you a comfortable and smooth start.
Quick-Start Guide
- Enable the new payment gateway
- Create a new confirmation page and select it via settings
- Activate/deactivate the notifications via settings
- After you received a bank transfer from your customer, click on “Confirm Payment”
- In case a payment is delayed, click on “Send Reminder”
Installation
Technical requirements
Please ensure that your web hosting meets the following requirements:
- PHP 5.3 or later
- MySQL 5.0.3 or later
- WordPress 3.4 or later (tested up to the current version)
In general the above-mentioned requirements are easily met by all web hosting providers. For a fast Wordpress WebHosting we recommend Bluehost.
Activating the plugin
Installation via Uploader
- Login to your WordPress dashboard
- Navigate to Plugins and click Add New
- Click “Upload Plugin”
- Select the previously downloaded zip file and confirm by clicking Install Now
Installation via FTP
- Extract the edd-bank-transfer-gateway.zip file on your computer
- Upload the edd-bank-transfer-gateway directory to the /wp-content/plugins/ directory
- Login to your WordPress dashboard
- Navigate to Plugins and activate the plugin
That’s it!
Inside the following chapters you learn how to configure and use the plugin correctly.
Configuration
The plugin settings page can be found when navigating as follows: Downloads – Settings – Tab “Payment Gateways”.
Gateway settings
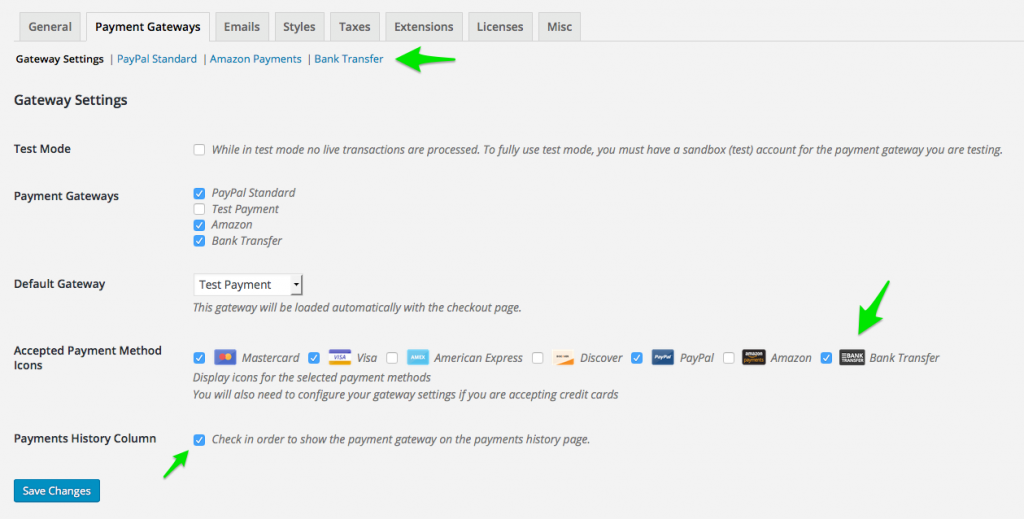
First you should enable your new payment gateway.
General settings
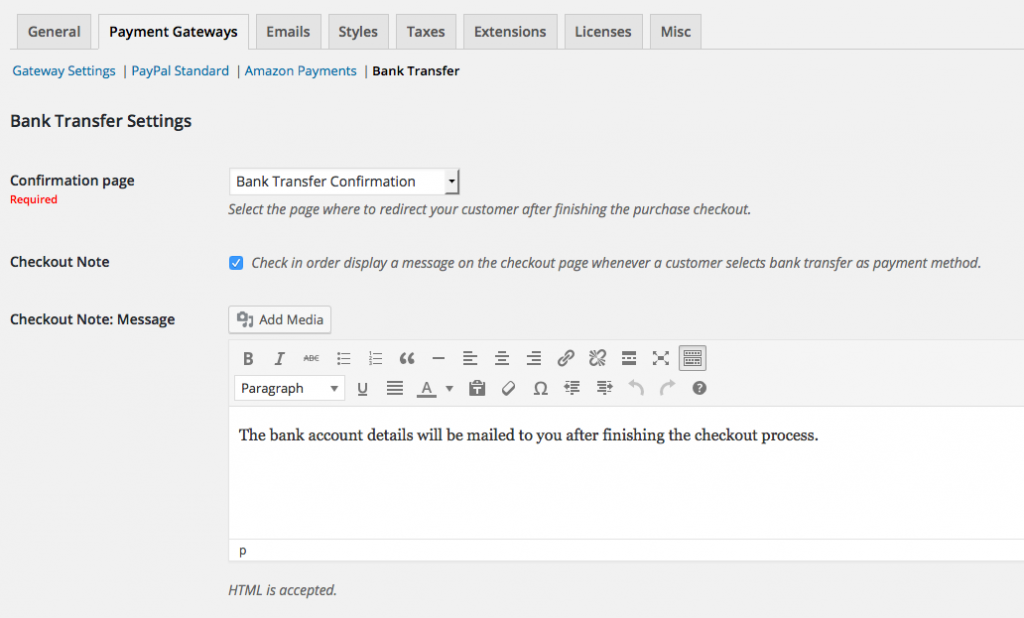
Our own payment settings can be found under the “Bank Transfer” tab/link.
License Key
When purchasing the plugin, you received an email including your personal license key which must be entered on the plugin settings page. Otherwise you won’t receive any future updates.
Confirmation Page
Here you define page, your customer will be redirected to after finishing the checkout process. This page can be used to …
- … display a thank you note
- … write down your bank credentials
- … let your customer know that he/she will receive an extra email including his payment details
- etc.
Selecting a confirmation page is required: We don’t want to forward the customer to the default success page, because the payment is not yet completed.
Checkout Note
Here you can enter a note which will be shown on the checkout page, after selecting bank transfer as payment method.
Notification Settings
Notifications will be sent to the administrator and/or the customer, whenever a new payment – using our gateway – was initiated. Notifications are optional an can be disabled easily.
Admin Notifications
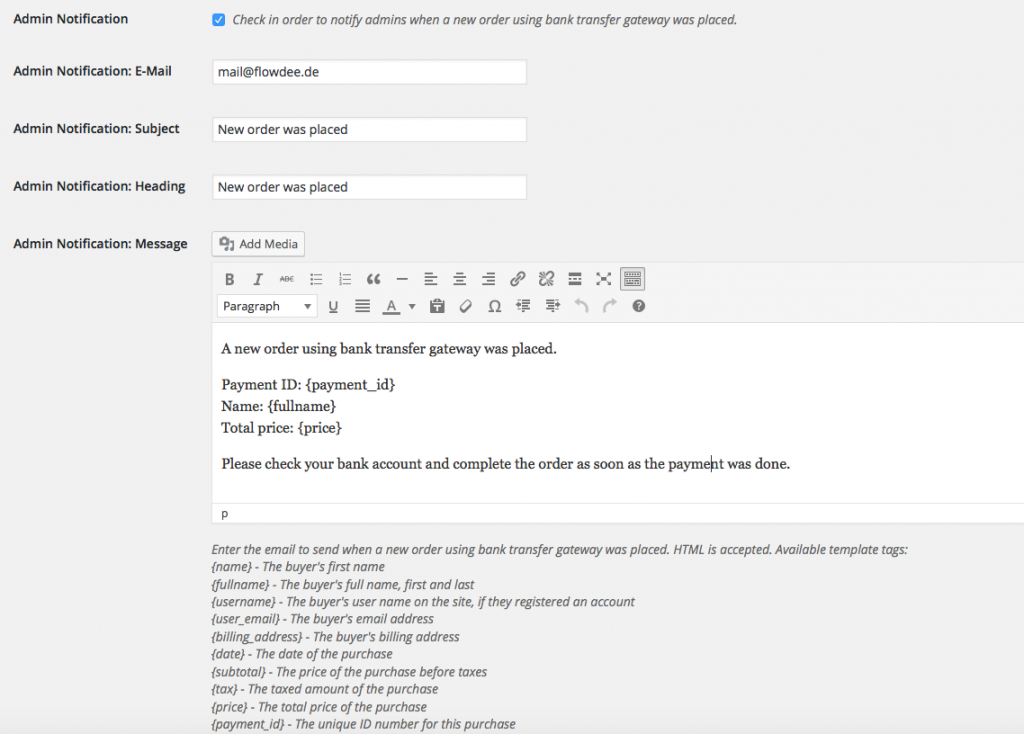
This notification will only be sent to the administrator. By default, the site administrator’s email address will be taken. Feel free to update it as you wish.
This notification email consists of a subject and a message. EDD’s placeholders are listed below the message field and can be used inside the message, as well as the subject field.
Customer Notifications
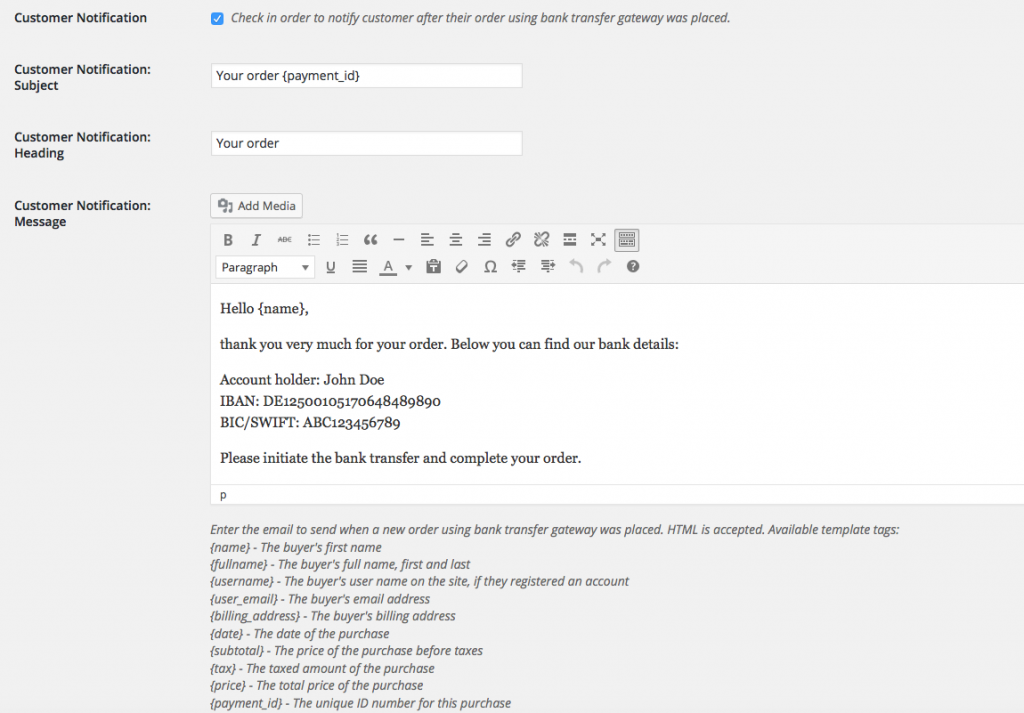
This notification will only be sent to the customer. His/her email address will be taken from the checkout process.
This notification email consists of a subject and a message. EDD’s placeholders are listed below the message field and can be used inside the message, as well as the subject field.
Payment Reminder Settings
In case your customer’s paying is delayed, you’re able to send out a payment reminder.
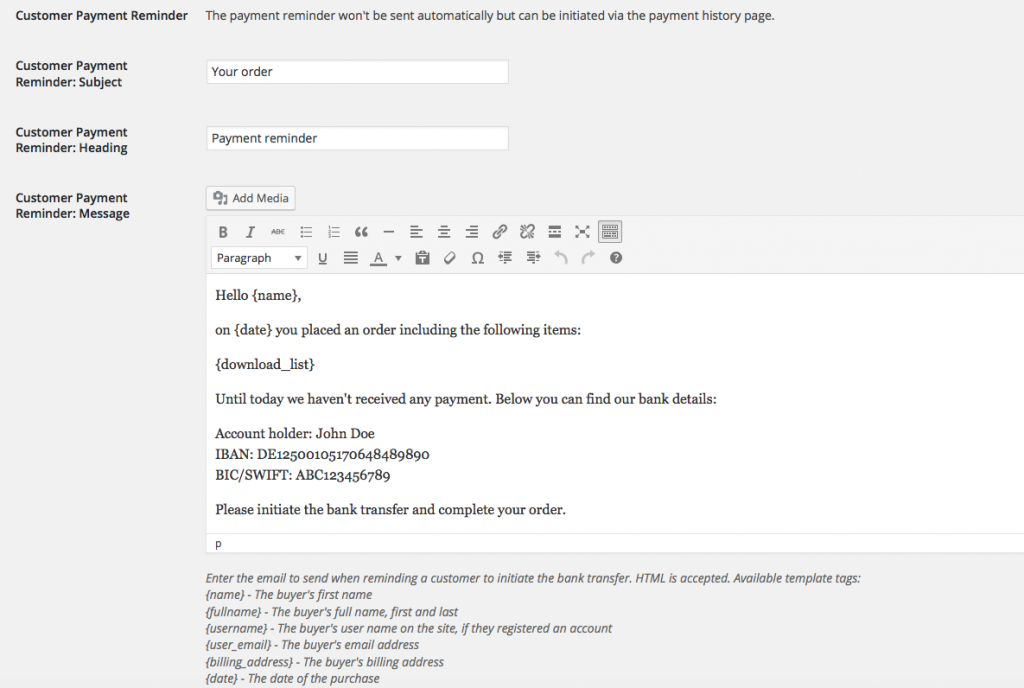
The reminder will only be sent to the customer. His/her email address will be taken from the checkout process.
This notification email consists of a subject and a message. EDD’s placeholders are listed below the message field and can be used inside the message, as well as the subject field.
Usage
Confirming Payments
After you receive a payment from your customer via bank transfer, you should confirm the payment inside EDD as well.
Therefore please go to EDD’s payment history page.
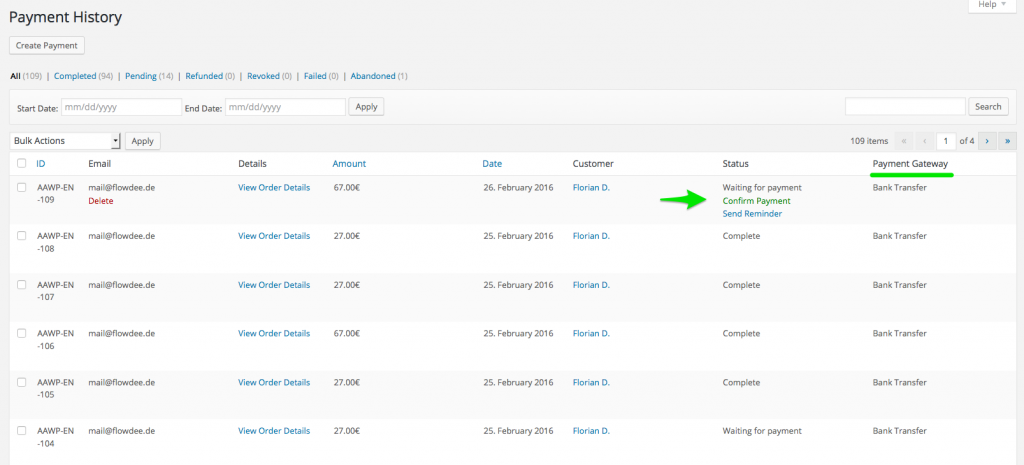
Look for the payment and click on the “Confirm Payment” link.
The payment will be completed and the download status set to “complete” automatically.
Sending Payment Reminders
In case your customer missed to initiate the bank transfer, you should send out a payment reminder.
Therefore please go to EDD’s payment history page.

Look for the payment and click on the “Send Reminder” link. Your customer will receive a reminder via email.
